Hello nail addicts! After spending some time testing out the brand-spanking new Picture Curable system (or PC for short) from beloved Aussie brand Picture Polish, I’m back with a detailed review. (Not all my posts are this long, I promise.)
I’ll take you through the full process of using PC, my results and thoughts on the system as a whole. It will be aimed at beginners and seasoned users alike, so includes some finer details on the basic processes. If you haven’t seen my detailed look at the lamp, go have a look-see in this post.
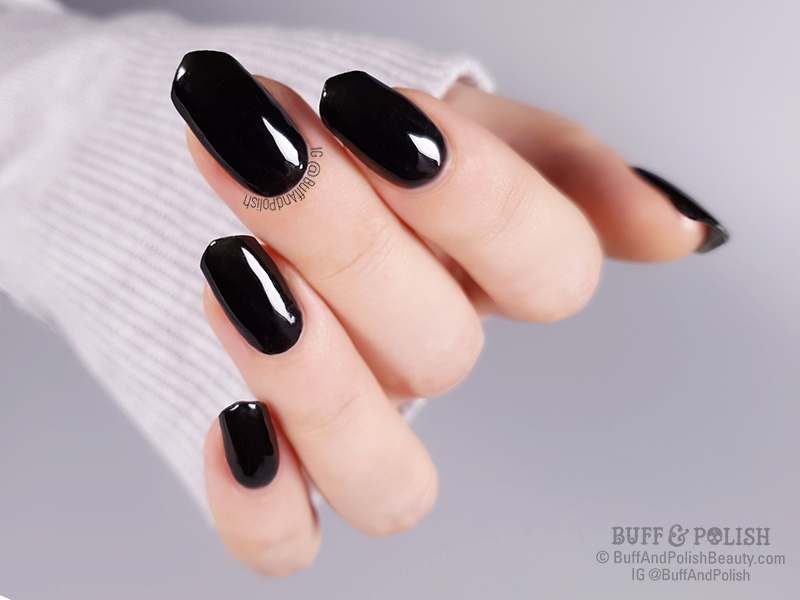
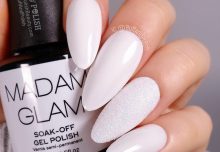
Picture Curable ‘Raven’ by Picture Polish – a creamy black lacquer
PREPARATION
To get the best and longest wear out of any nail product, proper nail preparation immediately before application is a key factor. It also works to reduce lifting, peeling and other issues sometimes encountered. Some people’s natural nail chemistry or type of job can interfere with keeping nail products adhered to the nail plate, but good preparation can improve wearability even for this minority of cases.
To prepare your nails properly before using PC Lacquer (or any gel, gel polish or even regular polish) requires sanitisation, removal of any cuticle, old product and all grease & oils from the nail.
If prepping nails immediately before applying Picture Curable Lacquer (any manicure really) it is best to do a dry manicure. That is without using water or soaking the nails in water. Water expands the nails; if you then paint them whilst in a swollen state, once they dry and contract again, the polish can chip, crack, or lift due to the stress. This will be even more noticeable in thin or brittle nails.
HOT TIP: A nail can absorb a decent amount of water in under 60 seconds (thanks to diffusion). So ideally you’d wait several hours after showering, dishwashing or any activity where bare hands have been immersed in water. You want the nails as dry as possible when applying the product for better wear.
Basic Steps for Good Prep:
- Completely remove any previous polish and shape your nails as desired. Brush off debris.
- Cleanse Nails: the dry cleansing method uses an alcohol wipe or non-fragranced sanitiser instead of water. If you wash hands avoid moisturising soaps (due to oils) and dry nails completely and thoroughly.
- Remove Cuticle: push true cuticle* back gently using an orangewood stick, plastic or quality metal cuticle pusher. Work backwards from the free edge if you haven’t done this for a while, using small circular motions up and down the nail plate to free stubborn cuticle.Oil free cuticle removers can be used to soften cuticle (use according to instructions). You can also push cuticles back in advance after a shower if you prefer to use water without affecting your polish’s wear time.
- Cleanse Nails: brush off debris and then wipe the nail over with isopropyl alcohol (at least 70%, I use 99% – the higher the better due to less water content), or pure acetone, or a mix of the two. This will dehydrate the nail for best adhesion. Don’t touch nail surface again after this else you risk adding back sweat/oils.
I liked that is not necessary to file or buff the nails with this system. Doing so too often thins the nail plate, so this is a bonus. (If you do have problem nails, you could very gently buff off the top surface shine with the lightest touch possible using say a 240 grit file or higher – though best to avoid if you have thin or weak nails)
A Note on Cuticle:
Just to be clear: true cuticle is the dead skin on the nail plate, not the fold of skin at the base of the nail (this is correctly called the Proximal Nail Fold. Cuticle is the thin layer of dead tissue that sticks to the nail plate to keep pathogens out. It is created by the eponychium, a super thin layer of cells on the underside of the Proximal Nail Fold).
I’m referring to the technically correct cuticle, and want to point this out to avoid any doubt (and potential for damage), as there is sooo much confusion as to what is and is not cuticle. Here’s the latest illustration that demonstrates what one of my favourite nail nerds, Doug Schoon (in conjunction with world-class scientists, dermatologists, podiatrists and pathologists) finally cleared up: the conundrum as to where these aforementioned things start and end in Fingernail Anatomy.

VIA Doug Schoon
APPLICATION
I found the application super easy. If you can paint your nails, you will be able to use PC Lacquer with little issue. There is no base coat required, which cuts out an extra step. Yay! But it also means that proper preparation (listed above) is even more important for good adhesion.
The process of application is similar to most gel polish applications – if you are used to that. It is really basic and involves:
- Prep: Start with clean dry nails, prepared as above. If using sunscreen, apply this 20mins beforehand
- Colour: Apply a first coat of colour – apply thinly, cap the free edge.
Cure for 120 seconds (2 mins) in the PC Lamp using the automatic sensor.
It is set to turn on and off at the correct cure time & intensity. - Colour: Do the same for a second coat of colour
- Top Coat (optional): Repeat process with PC ‘Glossy’ top coat – thin coat, cap the free edge and cure.
Voila! You are all done. No need to wipe off any tacky uncured product.
Some tips on application:
Avoid all skin contact with uncured product. If you get some on skin, remove it with a clean-up brush or lint-free wipe dipped in acetone or isopropyl alcohol (don’t use your fingernail) before curing. If you’re still mastering the art of neatly painting nails, I suggest using U-shaped nail protector stickers or latex around but not touching your nails, to protect the skin. No need to rush, just take your time.
Thick coats are not advised. It’s harder for UV to penetrate. They take longer to cure, and may pull away from the free edge. If they are too thick they may also wrinkle when curing. In which case you’d have to remove and start over. So keep it thin.
Mix the bottle really well to combine the product and pigments before use. This will help with getting even coverage in case it has settled.
The Spaceship’s (UV LED Lamp) automagic sensor timer is set to cure at the correct strength and time – very convenient! So remember not use the buttons on the back side of the lamp – the settings here may not cure at the correct intensity needed, leading to improper cures.
CURING
PC Lacquers are able to wear so long due to the addition of resins and photoinitiators. Whereas regular polish “dries” in air, curable based lacquers and gels “cure” to harden. In this process, the Spaceship lamp triggers a chemical reaction called polymerisation, when the resins and photoinitiators are exposed to the 395nm wavelength and its programmed intensity while your hand is in the lamp for the required time.
Curing is super simple. It takes two minutes for each coat to properly cure, so ensure you keep your hand in the lamp until it automatically turns off. Using the thumb rests (the divots in the metal base) for correct placement, and slightly spreading the fingers apart will ensure best cure.
You can wear UV rated fingerless gloves and/or 30+ SPF sunscreen if you are seeking preventative methods against UV exposure or taking photosensitising medications. Put on before painting. You can read more on this and the supremely minimal risks of UV lamps, with provided studies in my Spaceship Overview [links to post].

FIRST APPLICATION & BASIC WEAR TEST:
For the basic wear test I painted my Left Hand in Raven, the delicious creamy black lacquer. I left my nails longer and shaped as usual, then went about testing the application process. The first coat was semi-opaque, and applied carefully so as not to touch the surrounding skin; but covering the whole nail to provide a good base for subsequent coats – all of which were applied thinly as instructed.
The second coat saw this shade reach full opacity, and cured smoothly and evenly. It has a degree of self-levelling and cured nice and shiny without a tacky layer (which is just uncured product). I then used Glossy, the Picture Curable top coat and found it gave an even glossier shine. This too cures tack-free.
I wore this shade for 9 days and only removed it because I needed to use my nails. I chose to wear this shade cos I love black polish, I mean sometimes you just want to channel your inner Goth, am I right? Also so I could demonstrate how these polishes worked with chrome / mirror powders. But since this article is huge already, I’m saving that one for my next post.
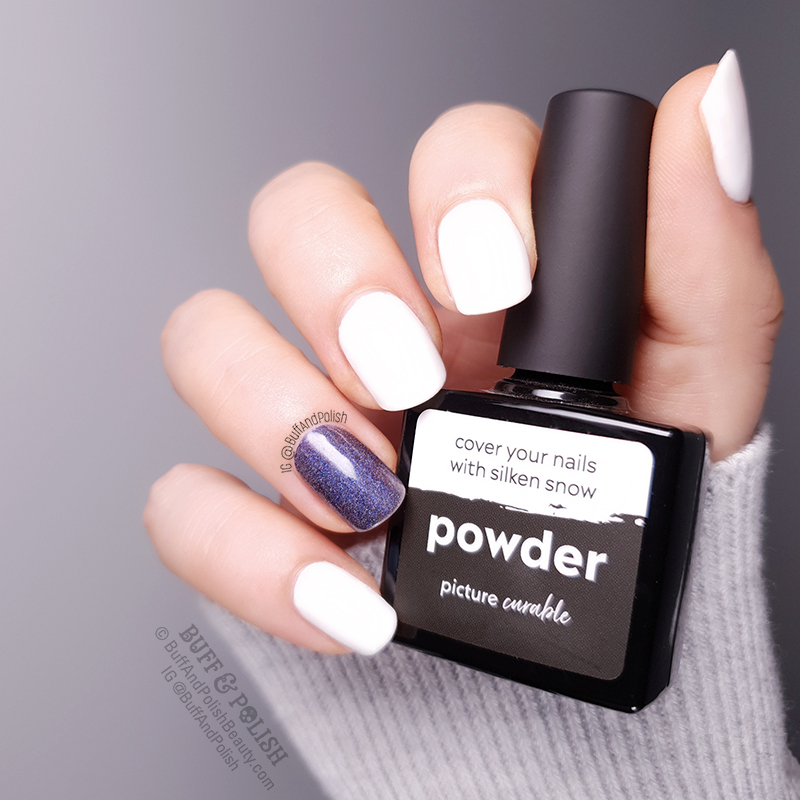
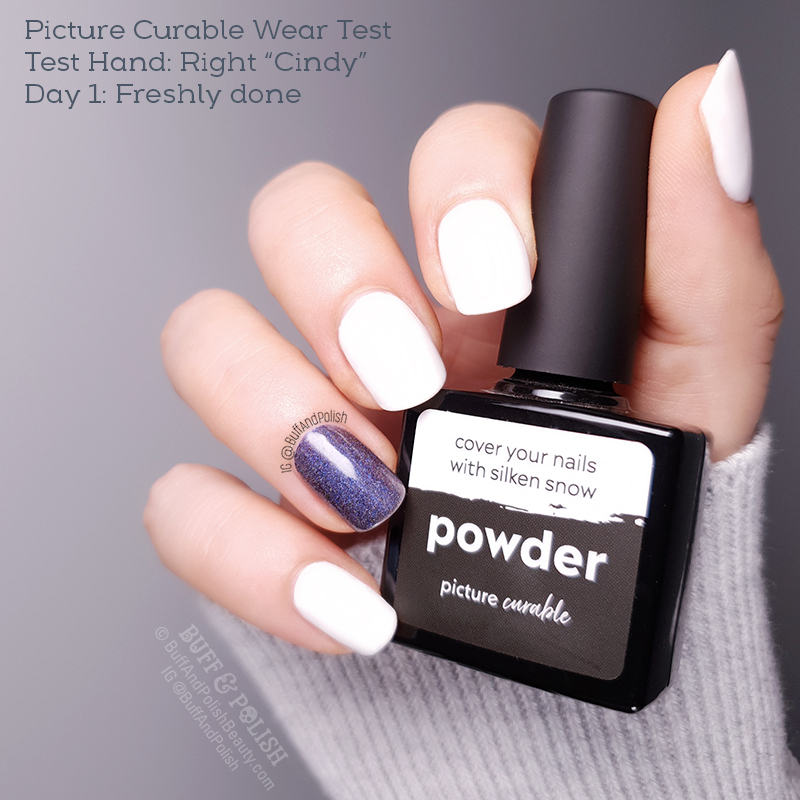
Picture Curable Powder & Stellar by Picture Polish, Wear Test – Day 1
LONGER WEAR TEST:
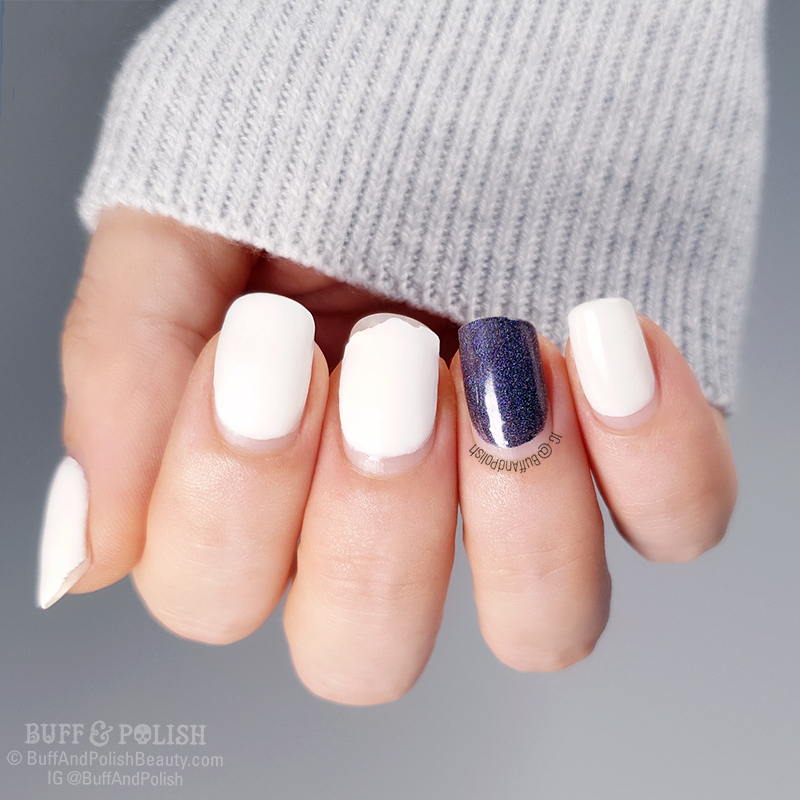
This is one thing I always like to test out with a new product line. I’m pleased to say that my wear test went very well. I painted Cindy (aka. my lesser seen dominant hand) to give it a proper road-test and you can see from the progress shots how it went. I paint the dominant hand when doing long wear tests as that is the one used and abused the most.
I used Powder (the creamy white lacquer), with Stellar (a blue to red shifting holo) on my ring finger. These nails were filed into a shorter, rounded shape to test the difference. You can see from the shots below how it wore for me. Each day I used cuticle oil and moisturising hand cream. I went about life as normal, to test the wear with normal activity. Cooking, typing, bathing, and inuring myself included.
Day 1: It remains unchanged.
Day 7: You can notice some regrowth, but it’s not too bad. Still in great condition. And little tip wear.
Day 10: The delightful regrowth is more noticeable here, but it is mostly passable. My nails grow quite fast, so your mileage may vary.
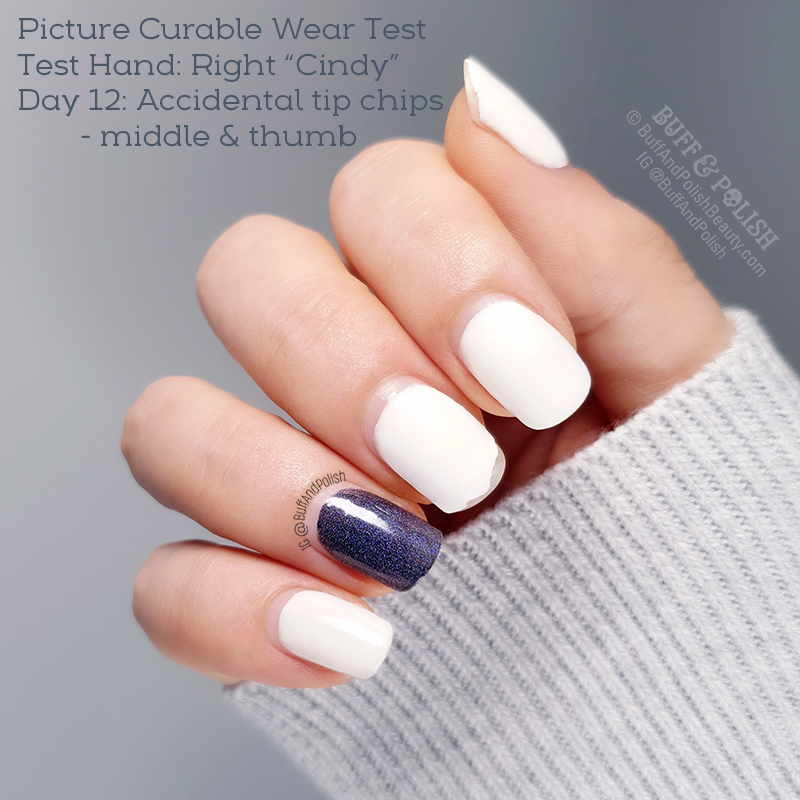
Day 12: You can see some signs of wear on 2 fingers, all others are still mint. On my thumb it was caused by using acetone and not replacing a glove with a hole in it. On the middle finger I was demonstrating my chef knife skills… Though let’s say I was more Swedish Chef than Marco Pierre-White on this day!? (Hey, I had to use my non-dominant hand). At least I had the Head Chef cussing down pat haha.
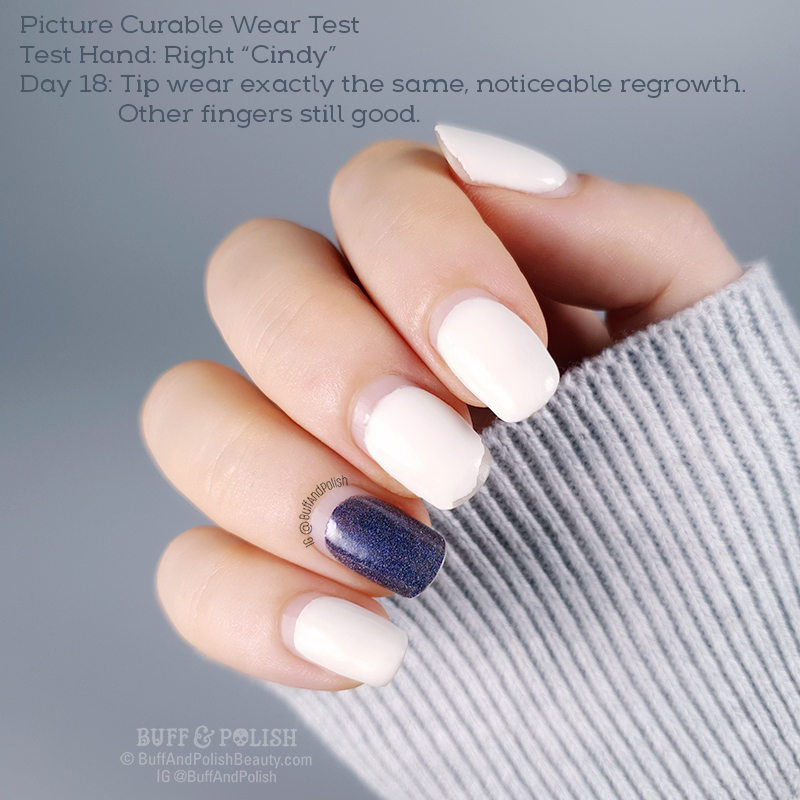
Day 18: Instead of removing at 2 weeks, I thought I’d see how it performed with the aforementioned tip wear and cuts. No further wear.
Day 21: I removed the 2 nails with tip wear and left the pristine ones to see how they wore beyond the general timeframe. Removal you can read about below, but there was no trace and no damage.
Day 38: (yeah, I know right?) Index and pinky fingers are still in peak form. No chips! Barely even wear on the capped tips. I mean the regrowth is looking epic, but this was about road-testing performance, not aesthetics. The wearability for me went beyond what I was expecting weeks ago, so I’ll be removing them now.

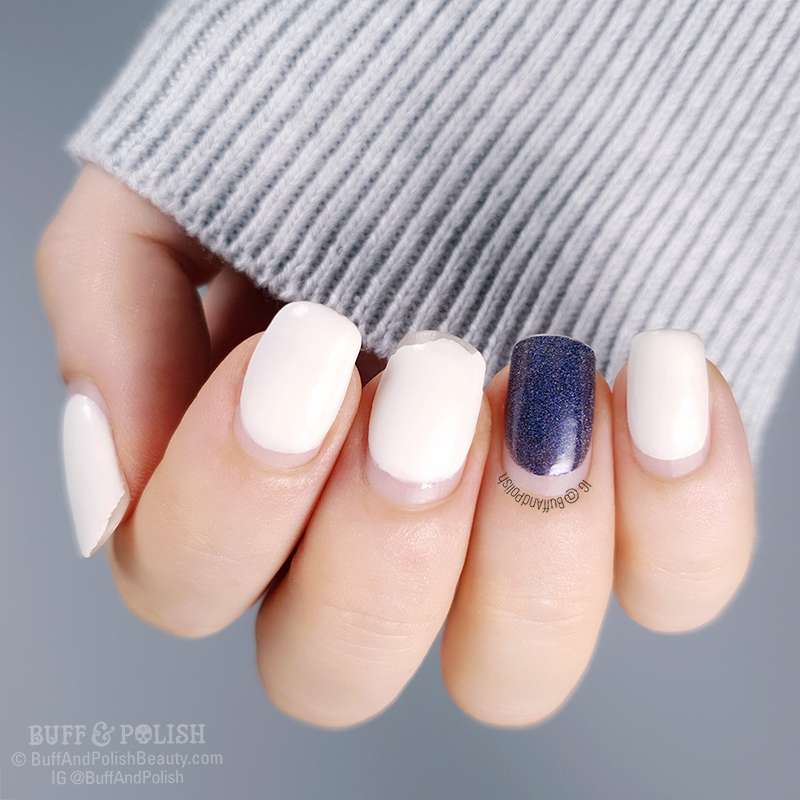
Click to enlarge images, as a gallery
I think the results speak for themselves. On the fingers where I accidentally chipped the tips impersonating the Swedish chef (Bork! Bork! Bork!) or acetone removed a bit (user error), I expected the lacquer to lift and/or peel. Never happened. It stayed in place on both fingers until I removed it. So colour me impressed.
I’m sure good prep helped, but I also believe it is just the way this product behaves. It is flexible but doesn’t seem to be as ‘plastic’ as compared to gel polishes. It doesn’t tend to act as much in the same way.
REMOVAL:
I used my test hand to also test various soak and foil methods of removal, after some people expressed a dislike for soaking in acetone. So here are the results of all:
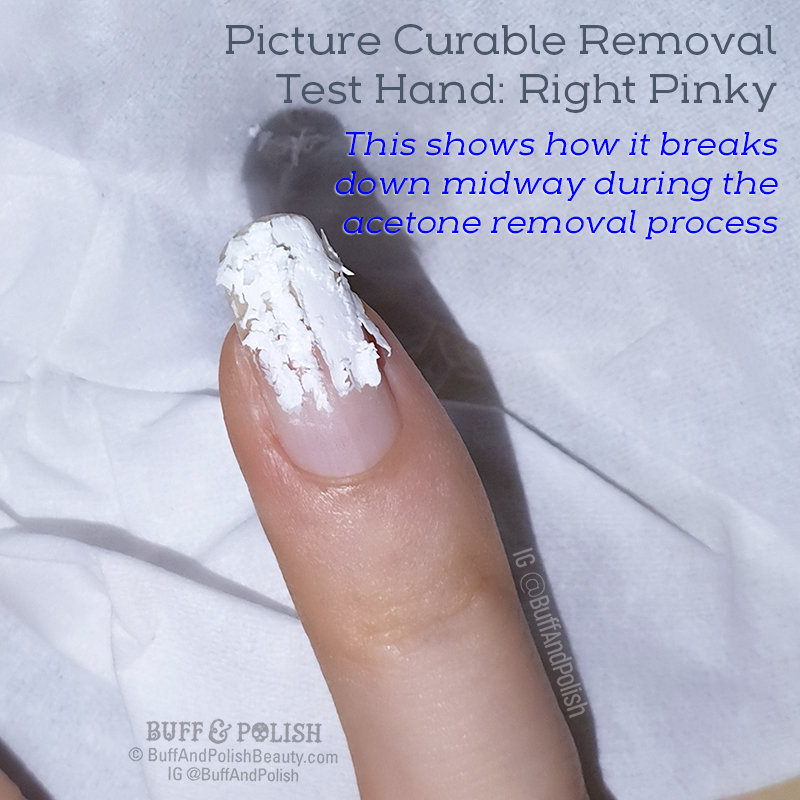
Method: foil method of removal, pad soaked in acetone under foil.
Finger: Thumb. Time taken: 5mins
Method: straight soak off in acetone bowl, very lightly filing top coat first.
Finger: Index. Time taken: 3mins
Method: foil method of removal, pad soaked in acetone, very lightly filing top coat first
Finger: Middle. Time taken: 4 ⅓ mins
Method: straight soak off in non-acetone remover, as is.
Finger: Ring (holo accent). Time taken: 5 ½ mins
Method: straight soak off in acetone bowl. No filing.
Finger: Pinky. Time taken: 3 ½ mins
Removal is where this system really shines! So simple and dead-easy. It is fast. Much faster than the regular gel or gel polish (even some regular glitter polish). I wanted to test for myself if the removal time exceeded the recommended time and by how much. As well as test different methods of removal. I had no damage.
It’s important to note, that the removal time quoted by curable product manufacturers, refers to the minimum time needed to remove the product. In some cases this takes longer. Removal time is also affected by other factors, including how many layers were used, nail preparation, and how long the wear-time has been.
The extra wear time didn’t seem to affect the speed of removal much for me. You generally notice that more such as removing after infills or nail coatings worn for even longer than I did. Also your mileage may vary, but this is how it worked for me. If using the soak method, you can buy soaking trays. Or just remember to use acetone-safe plastics (HDPE), or glass or ceramics bowls that won’t later be used for eating. (Avoid heat, flames and use in a ventilated area.)
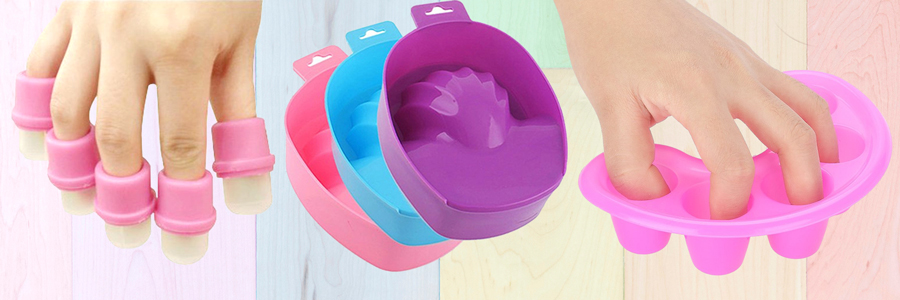
Curable & Gel Polish Soak-Off Bowl or Caps Examples
Non-acetone remover (containing ethyl acetate) worked, but does take longer. I suggest lightly filing down the top coat to aid penetration. I know some people were concerned about soaking in acetone, so that’s why I tried this method. Acetone is more effective and the quicker removal time means less contact with the remover.
Acetone isn’t very dangerous in these portions; it evaporates quickly and very little will enter the bloodstream via the skin in the amounts used for this purpose. (Rapid entry is via the lungs and stomach, so don’t drink it 😁 The liver breaks down most acetone into chemicals that aren’t harmful. We naturally produce acetone metabolising fat. It’s in nature – trees, food, air, soil). However it can be dehydrating and irritating to sensitive skin if left on for too long, so use a good moisturiser and cuticle oil after removal (or after lacquer reapplication if done at the same time). Non-acetone remover is still drying to skin, so ditto on the last point.
If using the foil method for removal, applying cuticle oil or a barrier cream to fingertip skin beforehand can help reduce dryness and irritation further, if you have sensitive skin. As can ensuring that you don’t wrap them too tightly.
And for the those wondering, I had no damage to my natural nails after any of the removals or methods.
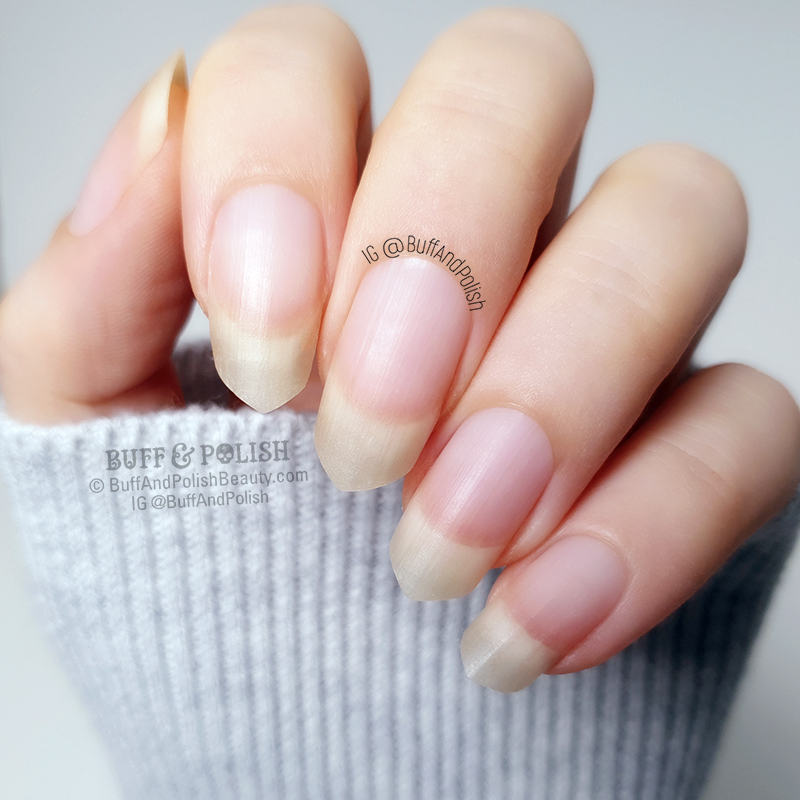
These are my nails after the Picture Curable by Picture Polish Removal Test – no damage
FINAL THOUGHTS:
- As a long time gel & gel polish user I’m well versed in the use of curable products. I was actually quite impressed with this new system, especially having thoroughly tested it out. If I was to say whether it was closer to gel or regular polish, to me it is definitely more like regular polish with a long wear capability. My opinion is based on how it behaves, wears and removes comparatively.
- Time wise, overall it’s a faster application process. Cure times for PC Lacquer compared to many of the LED gels are slightly longer, though not by much, so the process took similar time frame; but removal is so much quicker! There may be a small learning curve if you’re new to this, but a full long-wear mani or pedi could be achieved within a ~30 minute window. Give or take.
- The beauty of the fast removal means a faster breakdown of the surface when touched with acetone, so just a heads up that you’ll need to be more careful handling acetone whilst wearing Picture Curable lacquer. It’s not as forgiving as soak off gels if you accidentally get some on the nail, so use gloves or a plastic backed wipe if you need to handle it to remove other nails.
- Do you need the Glossy top coat? Well, not officially. There is no basecoat and these colours do cure quite shiny on their own. But I really do recommend it. It will give you a much deeper shine, protect from potential staining (turmeric or hair dye anyone?), and give far more protection from day-to-day living (especially for you bare-handed dishwashers out there). It will really bring the sparkly finish lacquers to life too.
- Follow the recommended directions. As I mentioned, do avoid getting uncured product on skin or living tissue, and you’ll need to use the Picture Curable Lamp. It’s important and needs reiterating, so I’ll just quote myself from this article [link to lamp article] (in case you missed it):
“Trying to cure gels or gel polishes under the PC Lamp will not work.
Trying to cure PC Lacquer under a typical UV gel lamp will not work.
Even if tempted to try either of these methods (which is a bad idea) and product may ‘appear’ cured, there is no way you can visually tell that it really is (regardless of which online bloggers argue otherwise). Product can still be uncured below the surface.
By ignoring this advice, you open yourself up to all sorts of issues like lifting, peeling, and potential overexposure issues – including allergies which are lifelong. Properly cured products do not pose a threat. So I strongly recommend you use as instructed so you can enjoy all kinds of curables indefinitely.”
WHO IS THIS PRODUCT SUITABLE FOR?
- Those seeking a long-wear product with super easy removal
- Those wanting to try a long lasting curable product but don’t know where to start
- Those who like the idea of gel but don’t have the time commitment to use or remove
- Those wanting extra strength without using gels; helpful for growing natural nails out
- Nail biters looking for a long-wear nail coating to help break the habit
- Home users and hobbyists that don’t change their polish daily
- Designed for the home user, it would suit professional techs –
- looking to offer a fast removal system
- wanting a longer wearing service for clients who prefer polish to gel, but with more staying power than regular polish
(mobile techs seeking the above will like that it’s lightweight, compact and transportable)
And that my friends, is the end! 🎉🎉 *CUE THE CONFETTI!* 🎉🎉
I hope this answered any questions, if not ask away.
I’d like to thank Jules & the PP girls for the opportunity to review this Picture Curable system. You’ll be seeing more of it on my nails for sure! Including that demo on how it works with chrome and mirror powders coming soon. As soon as you can say…

And that concludes my Epic Review of Picture Curable Lacquer – The Whole System From Go To “Whoa!” review post. See the products & supplies list with links below!
I appreciate and read all the comments, so feel free to leave your thoughts and questions below 
SUPPLIES USED FOR THIS NAIL ART:
Picture Curable Lacquers:
- Raven (black crème)
- Powder (white crème)
- Stellar (blue to red shifting holo)
- Glossy (shiny gloss top coat)
Other:
- The Spaceship, Picture Curable UV LED Lamp
See more about these items at Picture Polish VIA THIS LINK!
Please Subscribe to my YouTube Channel ![]()
Feel free to Add Me to Your Feed on  and Connect / Follow me here:
![]()
![]()
![]()
![]()
Related Articles

7 Comments
-

Really helpful review,answered all my questions, thank you.
-
 Author
I appreciate the great feedback and am so glad you found it helpful. Thanks for stopping by to have a read 😊
-
-
Epic review! Really helpful with explaining the whole process and reasoning behind it!😊
-
Author
It did get rather long haha. Thanks so much Angela – that was what I was aiming for and I’m glad you found it useful 😉
-
-
Hi there, I came across your article and I just wanted to say how much I enjoyed reading it.
I also wanted to share my own website, http://www.crazywomen.pk, which offers a wide range of stunning jewelry pieces for men and/ women.
From earrings to necklaces and bracelets, we have everything you need to add a touch of elegance to any outfit.
Our jewelry is crafted with care and attention to detail, ensuring that each piece is of the highest quality.
I would love it if you could take a look and consider adding a backlink to our website in your article.
Thank you for your time and consideration!


