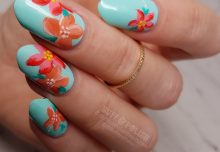
Since gel gradients are much easier to demonstrate than explain by text, I have created a video tutorial on how to do this yourself. You can see it at the bottom. This was the first step to the nail art for Pastel Polly – the swatch can be seen here.

The best way to do gel gradients is to use the most highly pigmented colours you can. It will make the gradients much easier to blend and gel paints or opaque pot gels are great for this. Unlike using a sponge as you can with regular lacquer, it is safest to do a gel gradient with a brush (so as to avoid potential over-exposure which may cause allergies – which you would get with a sponge).
The gel polishes I used in this were sent to me by the awesome girls at Opallac and I combined them in this gel polish vertical gradient. What do you think?

Here is the video tutorial over on my YouTube – please go and subscribe 🙂 Buff & Polish YouTube Channel – http://bit.ly/BAP-YT. The short link is more memorable if you don’t want to do a search.
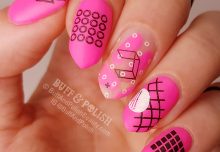
This was the stamping I added to it at the end… already seen in the last post.
But as a refresher here it is again.

SUPPLIES USED FOR THIS NAIL ART:
Polishes:
- Pastel Polly – Opallac
- Appletini – @opallacgelpolish
- True Blue – #opallac
- Snowed In – Hit The Bottle
Other:
- Make Your Mark 02 – Lina Nail Art Supplies: @linanailartsupplies #linanailartsupplies
- IBD #6 Flat Gel Brush
Feel free to add me to your feed on  and connect / follow me here:
![]()
![]()
![]()
![]()