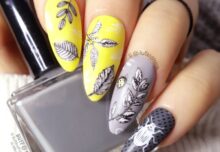
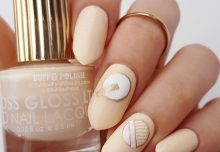
You know those days when there are sooo many options of what you can do to a set of nails – so many choices and techniques, colours and styles? Today is one of those days. So I thought I’d use something I haven’t in a while to jazz up my nails: Pigments.
I love using other things to make nail art so I decided on a combination of vinyls, pigments and charms. I went with a green/purple toned gradient as we are heading into the cooler months here, and my poor broken body has been feeling it. It’s actually warmer than usual at this time of year, so El Niño has definitely started breaking down. But I feel the cold.

I started with a base of white polish in OPI’s Alpine Snow. Using a thin layer of slow dry top coat, I dry brushed the pigment into the tacky layer. Just enough to stick. Since I am not using gels this time (which I usually do with pigments) I did two layers of pigment to build up the colour. This layer was then topped with a fast dry top coat, for protection and a good surface upon which I could stick vinyls if needed.

And another angle above… Yessum, jumper time!

Here’s a close up of the vinyls that I used. Courtesy of the awesome Whats Up Nails store if you’re looking to buy some. I love these stencils. They are pretty rad and lots of fun to use. You can even use the left over skeleton pieces to stick on or use however.

And another shot in the usual ‘holding a fat sausage’ hand pose.
Video tutorial of the pigment application:
And the Vinyl application:
SUPPLIES USED FOR THIS NAIL ART:
Polishes:
- Sinful Colors – Snow Me White
Other:
- X-pattern Stencil Vinyls from Whats Up Nails
- Colour Pigments


